It’s In The Bag

Sooo…I’m writing this post much in the same way that I’ve started my most recent posts…with snow on the ground.  Yep.  Snow.  In March.  Mid-March.  Three days before Spring.  *Sigh*  My mom told me that spring will be here soon.  I sure hope so!!

No matter how depressing or inconvenient the snow is, it has allowed me to do a little sewing!  Silver lining, right??  I am really excited to share this newest project with you.

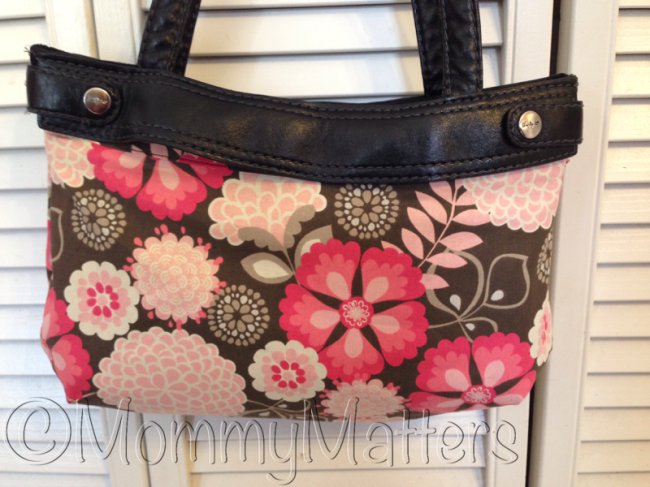
First of all, I made this bag the other day.  I will tell you all about it in a later post.  Don’t get me wrong…I LOVE this bag.  I think it’s adorable.  But, after I finished making it, I discovered something…

Image

It’s HUGE!!!  You probably can’t tell in this pic, but trust me…BIG bag.  I really like a big bag to carry all my junk around in, so I was going to carry this, no matter the size.  But, I had visions of myself digging in the bottom of the bag, searching tirelessly for my keys, phone, etc.  

Several months ago, a friend of mine showed me a cute little pouch that snapped shut. She had gotten it at a crafts fair or something.  It was really cute and looked pretty handy.  It didn’t look like it would be too difficult to make, so I turned to my trusted source…Pinterest.  Low and behold, I found this link.

I had a bunch of leftover fabric from my bag, so I figured, why not?  I went to Wally World and bought a cheap measuring tape (I think my hubby would have been a little upset if I had used his!) and went to town.

Now, if you can cut in a straight line and sew in a straight line, you can make this pouch.  In no time at all, I had this…

Image


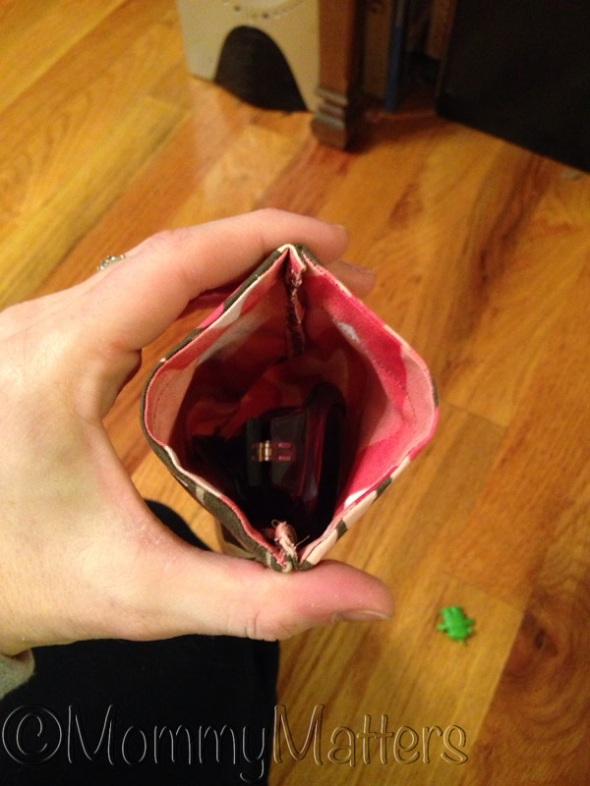
Here’s the inside…

Image

And one with stuff in it…

Image

My keys…so I don’t have to go on a scavenger hunt to find them!  I thought, why stop there?  It didn’t seem to take very long to make one.  So, being the nerd I am, I timed myself.  Not rushing through the process, I started the clock from the point of measuring and cutting out the fabric.  From cutting to done…21 minutes!!  This included cutting the measuring tape and taping the ends so it won’t cut through the fabric!!  I love it!

Today, I decided I needed a sunglass pouch.  My first attempt was a little short, so my ink pens ended up in that one.  My second attempt was better and I got this!

Image

All in all, I have made 4 (so far).  Not only are they super cute, easy to make, they also hold a lot more than you would think…

Image

Image

That last pic is with everything inside!  Amazing, right!?  That would all be in the bottom of my bag…lost forever!

I can’t complain with anything in this project.  The tutorial is super easy to follow.  You can use scrap fabrics, fat quarters, fabric from the remnant bin…pretty much anything you have.  It takes hardly any time at all.  I can’t even calculate how inexpensive it is to make these.  I’ve already made 4, and I have a lot of measuring tape left!  If I had to estimate, I would say $1 to make one, and I think that’s on the high end.  

I’m sure school is going to be closed tomorrow.  I bet you can’t guess what I’ll be doing!!!


Don’t Skirt The Issue

If you look at my “sewing” board on Pinterest, you’ll notice most of my projects are bags.  I don’t know what it is about bags, but I love them.  I have acquired a lot over the years.  Big ones, small ones, in between size.  Bags for my hubby.  Bags for the kids.  Bags for the kids toys.  With the amount of bags I have, you’d think I’d be more organized…

One of the items I pinned was this one for a knock off skirt for 31’s “Skirt Purse”.  Now, let me first start by saying I LOVE 31.  It’s a great company, comprised of mainly bags and really cute purses.  What’s not to love???  And, I have several friends who sell 31.  I’ve had tons of parties, so I’m not knocking the company or their products.

However, sometimes, they get rid of a print I really liked.  Or, they don’t have one that I would like to have.  What’s a girl to do???  You make your own skirt!

I pinned this project a looonnggg time ago.  It’s about the 3rd from the bottom of my board, so that should tell you something.  When I joined Pinterest, I really didn’t have a lot of sewing experience, so this project intimidated me a little bit.  Yesterday, I decided to tackle it.

Let me start by saying, the tutorial is well done.  The instructions are clear and the pictures are helpful.  I love the fact that the pattern is FREE!  The skirt didn’t take a lot of fabric.  I’m not exactly sure, but I’d say it was probably less that 1/2 yard…but don’t quote me on that one!  I’d also say this is for a semi-beginner to newly intermediate sewer.  Don’t you just love my decisiveness!

From the time I started to cut the pattern out & piece it together, to hand sewing the clips on…it took me about 2 hours to make.  Seriously.  Two hours!  Talk about your instant gratification!!

Image

Image

My son photo bombed one of my pics :).  I love this fabric that I found at Joann’s a few weeks ago!   I originally got it for another bag that I’m making.  Of course, I’m sure I’ll blog about it when it’s finished.

The only thing I changed from the tutorial was the way I placed the clips on the skirt.  Where they’re placed on the pattern didn’t quite line up with my purse.  I have another skirt that I used to line up the clips an it fit perfectly!  I also didn’t worry too much about sewing the clips on.  The instructions said to be careful to not sew through both layers of the fabric, or else your stitches will show on the outside part of the fabric.  I wasn’t willing to take time to slow down & I really dislike sewing by hand.  I reasoned that the top part of the purse covers up the clips anyway, so no one will notice.  Shhh….it’s our little secret.

If you’d like to make this skirt, but don’t have a skirt purse, click here.  This will take you to my good friend’s 31 website.  You can check out the catalog and even order from there 🙂

Have a wonderful day!  Happy sewing!

I Didn’t Start The Fire…

I know…I know.  It’s been a while.  Let’s see if I can remember how to do this.  Today, we had a snow day.  It’s March.  More specifically, March 3rd.  Now, around here, everyone says “We get our biggest snows in March”.  Gotcha.  I’ve lived in Virginia for over 6 years now.  I still can’t get used to that.  In Oklahoma, 2 weeks of March is “spring” and then it’s break out the shorts weather.   Thank you March snows.  My son will now be going to school during the summer.  

About 5 1/2 years ago, we started house shopping.  One thing my hubby was adamant about was getting a house with a secondary heat source, i.e. a wood stove.  I wasn’t too keen on the idea at first.  Wood was messy.  It made your house smell like smoke.  It could be dangerous around kids.  I had a list of reasons.  However, logic won out and we got a house with a wood stove.

Fast forward 4 1/2 years later…I wouldn’t trade our stove if you paid me.  Well, maybe if you paid me…but it would have to be a lot!  The type of heat you get from a wood stove is amazing.  It’s really hard to describe, but it’s warmer than any other type of heat source, if that makes sense.  If you have one, you know what I’m talking about.

Anyway, with our winter being what I would consider unusually long, our wood supply is getting dangerously low.  Even scarier…the fire starters we use to, well, start our fires are not being sold.  They”re seasonal items and in most parts of the country, it’s not that season.  So, where do you turn when Walmart runs out of your fire starters?  Pinterest, of course!

I found this link for DIY fire starters.  I had my doubts that they would work.  It seemed a little too simplistic.  Lint, egg cartons, string and wax.  Really?

The guy (I suppose it’s a guy who posted it…I could be wrong) mentions using Belgium Beer.  Nowhere in the tutorial could I find him using the beer in the fire starter.  Maybe he used it to celebrate with…who knows!

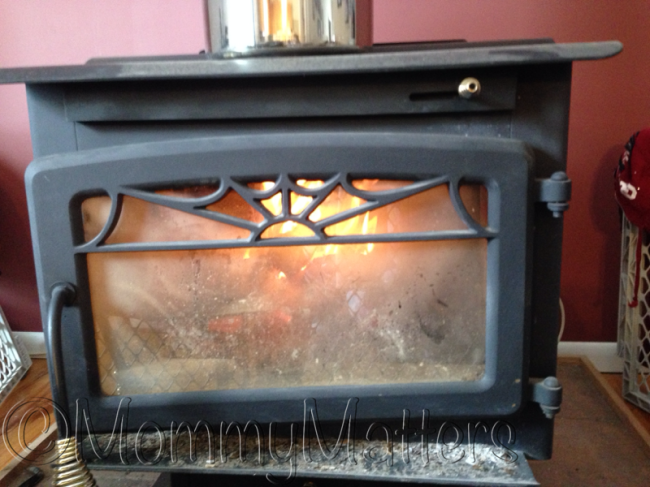
Other than eliminating the beer, I followed the tutorial verbatim.  I let them dry overnight, because I started making them around 10:30 at night.  As promised, when they dried, they were hard as a rock.  The tutorial said his starter lasted about 15 minutes.  Me, being the skeptic timed it.  Sure enough…the starter lasted 15 minutes on the dot & by the time it burned out, my fire was blazing.

Image

How does it compare to purchasing the fire starters pre-made?  Well, cost wise, it’s about half to make them.  The wax was about $4 for me.  I used about  1/4 of the box.  So, I figured it cost $1 to make 12.  If I have old candle wax that I can’t burn anymore, I can use that and the starters will cost me zilch.

It took me about 1 hour to make them, from start to finish.  One thing I’ll do differently is to cut the wax into much smaller pieces.  That was the most time consuming part of the project…waiting for the wax to melt.

My hubby was very impressed.  I figure if I make up a dozen or so each week during the summer, we’ll have plenty to use during the winter.

Now, if you’ll excuse me…I need to throw another log on the fire.